|
|
 |
|
|
My 2008 Jan-July Flying Adventures My 2008 Aug-Dec Flying Adventures My 2009 Jan-July Flying Adventures My 2009 Aug-Dec Flying Adventures My 2010 Flying Adventures My 2011 Flying Adventures My 2012 Flying Adventures My 2013 Flying Adventures My 2014 Flying Adventures My 2015 Flying Adventures My 2016 Flying Adventures My 2017 Flying Adventures My 2018 Flying Adventures My 2019 Flying Adventures My 2020 Flying Adventures My 2021 Flying Adventures My 2022 Flying Adventures My 2023 Flying Adventures Replacing Internal Garmin GPS Battery Dynamic Prop Balancing Service
Send me e-mail: bobbyhester857@gmail.com
|
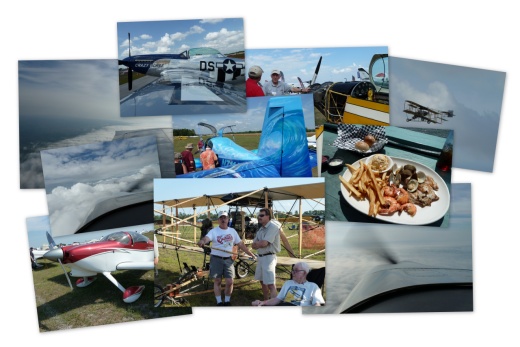
My 2012 Flying Adventures Jan. - Feb.
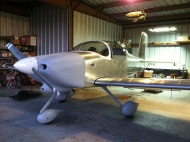
2012 While I was cleaning the engine area I found a bolt missing. My exhaust support goes to that bolt and even with a star washer it still vibrated loose. The picture was taken while I was laying on my back on a creeper looking up. I found a crack on my air filter box support plate again, so I made a new one. I've gone thru two of them in 550 hrs. That is pretty common on an RV. Did all the other normal stuff and the condition inspection was done. While I was working on the inspection I also worked on my engine cowling and empennage fairing to get them ready to prime, and I finally got them done. You can see the finished cowling in the upper left corner of the page.
Mar.
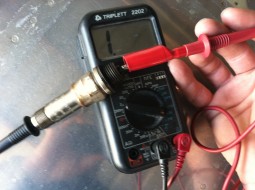
2012 I decided I would try to locate one on the Van's Airforce web site. I got a suggestion to contact Aircraft Magneto Service in Washington state. I sent them an email and they told me that they do not sell used coils but suggested that I purchase a Tempest PMA coil, P/N A-13009. They said it is a more robust coil and would not fail and it is cheaper. They went on to explain to me why my coil failed, or at least most likely why it failed. They said that most coils fail due to a bad spark plug. They told me to check the ohms resistance of my plugs and if any checked over 5000 ohms to though it away and replace it. This was news to me I had never heard anything about this. I did not think I would find a bad plug, they were all firing just fine and I had just cleaned them and did not see anything wrong with them. They said to put one probe into the barrel and touch the other one to the tip. Three of them measured between 1341 and 1457. The last one I could not get a reading on at all. I told Aircraft Magneto Service what I found and they told me, that plug is what caused my coil to fail. Even though it was firing good it had a problem. I told them that I had dropped a plug the first time I installed them but I didn't find anything wrong with it and it was working just like it should. I guess I had damaged the plug but could not tell. So, I guess it all makes sense. I'm here to tell you, just like everyone says, if you drop one throw it away. A $22 plug cost me a $275 coil. I never have read anything about checking the resistance of your spark plugs, so if you never have either, now you have!
April
1,
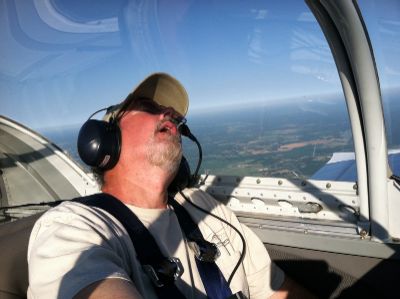
2012 The next day we hit the show early. Got around to see everything that we missed the day before. Had some snacks here and there and ate lunch at Fred's Southern Cooking, about the best place to eat at Sun-n-Fun, they have a great Salad bar. Took all our stuff back to the tents and visited with some of the RVers in the camping area. Aaron Tippin performed at 7pm, he did a great show. We decided to launch for home Friday mourning. We weren't in any rush to get out so we took our time wiped down the plane and the tents, then packed everything up. We taxied to the runway and were put in a number three slot of position and hold for takeoff. A Bonanza was #1, a Cessna 172 was #2 and we were #3. After takeoff we climbed out above both of them and about 4 miles out we passed the Bonanza on the outside of the turn to the north. We headed to X35 - Marion Co. for the cheapest fuel around. There was two RVs waiting at the pump and a few minutes after we got out and talked to the other guys the Bonanza pulled up behind us. We got fueled up and was the first one to takeoff. Cedar Key, FL here we come! We got there about 11:30 and ate some of the best seafood around. If given a choice between going to Sun-n-Fun or Cedar Key, I would pick Cedar Key! If you are ever in that area you have got to go there (If you like seafood). We took off from Cedar Key at 2:30 and headed toward Atlanta. We knew we had weather that we would meet up with near Atlanta. My buddy Finley had weather on his GPS and it was time for it to shine. We started out at 8,500 feet and as we approached Atlanta we climbed to 10,500 to stay above the clouds which were still broken and we could go down if we needed. Atlanta did not want us to go through their airspace so we were instructed to go around the east side because the weather we were racing had arrived on the west side. As we headed around the east side we ended up having to climb, lets say a little more and we made it around and headed toward Shelbyville, TN. We actually stopped at an airport a little south of Shelbyville but found that the price of gas was about a dollar higher per gallon so we never got out of the plane there. Refueled at Shelbyville and headed home. The in aircraft weather is great when flying a trip like this. I just can't justify nearly 40 dollars a month for it, when I would only use it on a couple trips a year. Waiting for ADS-B equipment to come down in prices and hoping to be able to go that route in a few years. Weather and traffic with no monthly fee seems to be the way to go. Now if XM weather would lower their price to about 15-20 dollars a month it might be worth it. Here
is a link to my pictures: June 16, 2012 This year there are a few different airports. Two airports are really neat to fly into. The first one, is not new this year, it is Middlesboro-Bell County (1A6) it is at the bottom of a valley surrounded by mountains, very fun to fly into. The second one is new this year. It is Tucker-Guthrie Memorial Liberty (I35). The runway located on the side of a mountain. As I was coming down on final approach I saw a house with a car in the driveway above my left wing tip. Here is a link to the pictures: The first day was a long one, took off at 7:12 and landed back at KHVC at 4:27. I borrowed a friends GPS that had weather on it. That was a good move there were a few storms that I had to fly around. June 16 - 20 airports - 6.5 hrs
flight time - 52.5 gallons of fuel
Just Kidding :-) Have you seen Turtleman on TV? Check him out on youtube, YeYeYeYeYe Live Action!
Oct,
2012
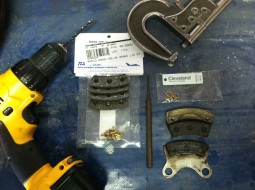
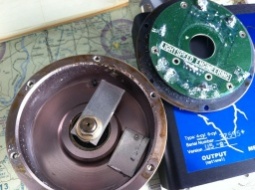
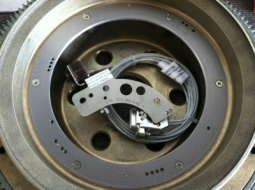
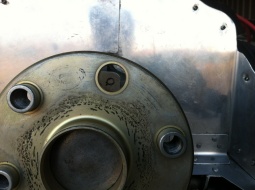
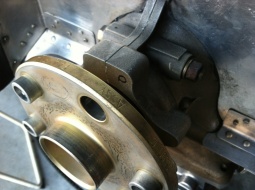
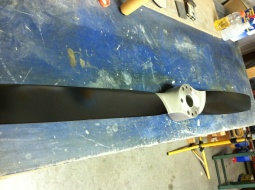
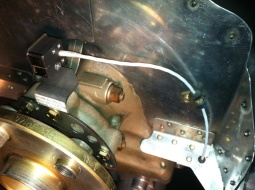
After looking at Lightspeed's web site, I found that they have a new version of there direct crank pickup. The mini sensor, it looks like the way to go. It is a little more work to install but after it's installed it should be rock solid nothing more to brake. I pulled the prop and then pulled the fly wheel. Sent the flywheel to Lightspeed to have the ring which holds the magnets installed. While waiting for the parts to come back it was the perfect time to sand down the back of my prop, prime and paint it. Prop turned out great! Got the parts from Lightspeed. The first things that has to be done is to removed one of the prop flange bushings so that I can drills and tap three holes into three bosses on the engine block. This is where the bracket has to be install that will hold the mini sensor. I ended up using a piece of all tread, some washers, nuts, a socket and a spacer to pull the bushing out. I'm going out of town with work for a couple weeks and my buddy that runs a machine shop is going to order the drill bits tap that we'll need to finish up the job.
Nov, 2012
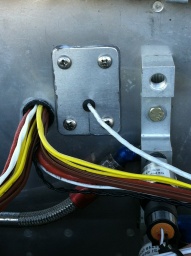
Timing checks out good and cover plate is installed.
|